Windows 10 is a great operating system, but it’s not perfect. One of the most annoying things about Windows 10 is that it constantly updates itself, which can cause problems with other programs and cause you to lose work. Luckily, there are ways to stop automatic updates in Windows 10, so you can keep your computer running smoothly without having to deal with constant updates.
How to Stop Automatic Updating on Windows 10/11
There are several ways you can stop automatic updating in Windows 10 or 11. Here are the best ones:
1. Pause Windows Update Via Settings
The easiest way to pause Windows Update is to use the Settings app.
- Open Settings and go to Update & Security > Windows Update > Advanced Options
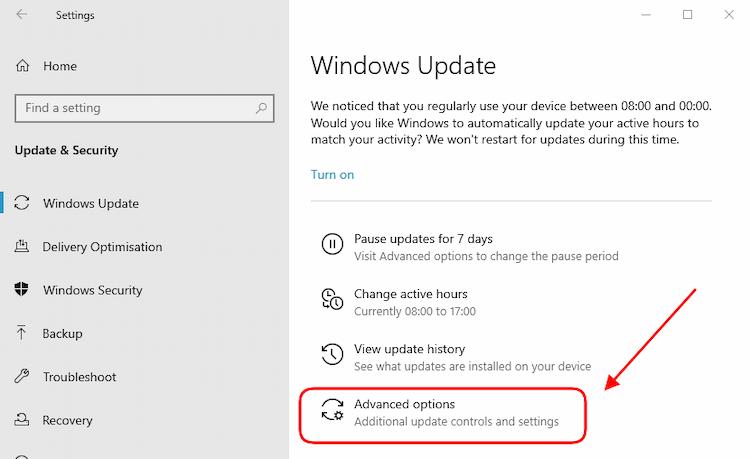
- At the bottom of the page “Pause Updates” choose the date from the drop-down menu
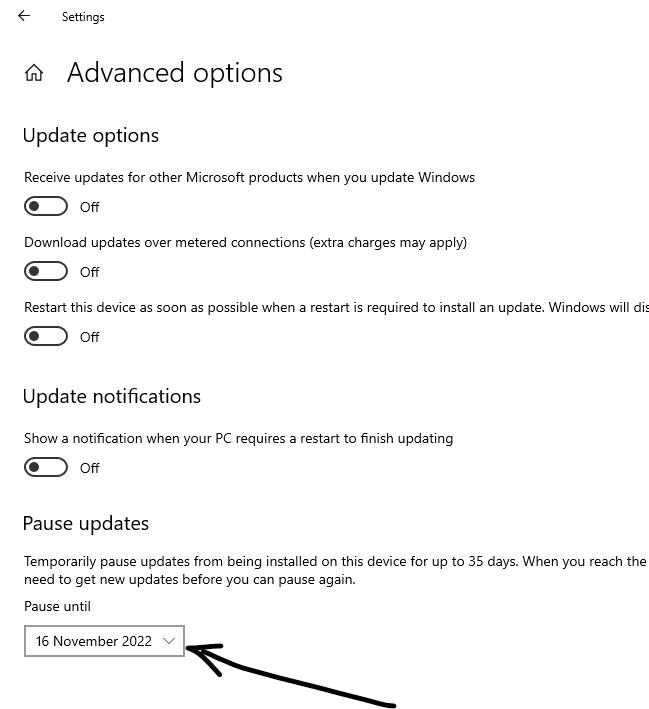
- This will Pause the Windows Update service for up to 35 days, which will prevent it from automatically downloading and installing updates.
2. Disable Updates Using a Registry Hack
The easiest way to stop automatic updates in Windows 10 is with a simple registry hack. To do this, follow these steps:
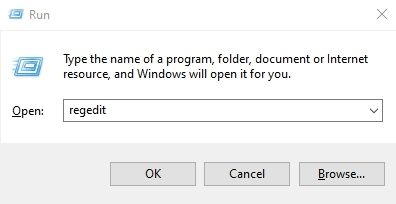
- Press the Windows + R Type regedit and press Enter to open the Registry Editor
- Navigate to
HKEY_LOCAL_MACHINE\SOFTWARE\Policies\Microsoft \Windows- Here Right-Click on the Windows folder and Create a new key
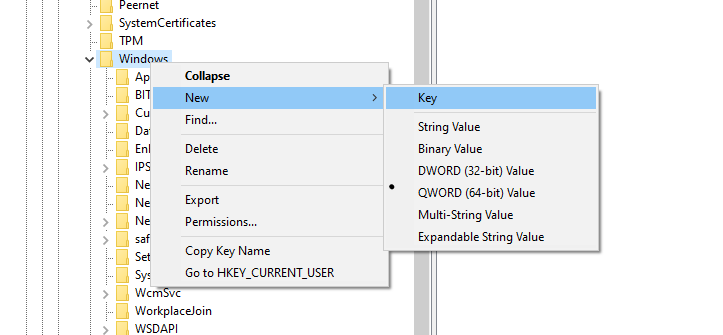
- Rename the folder and change it to WindowsUpdate
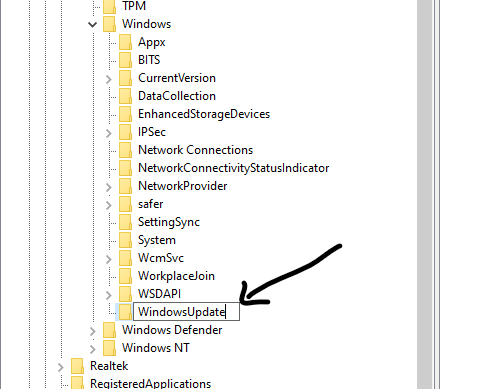
- Now again create a new key name AU under WindowsUpdate

- Finally, Right Click on AU Foder Create a new DWORD (32-bit) Value called NoAutoUpdate
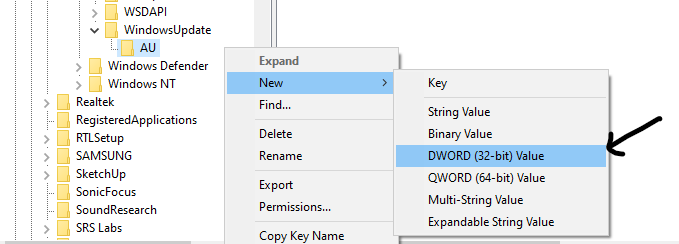
- Then Double-Click on NoAutoUpdate and set the Value date 0 to 1
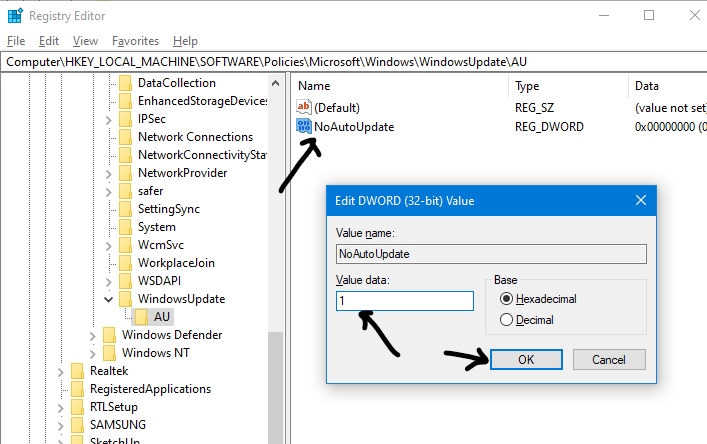
- Click OK to save the changes and exit the Registry Editor
- Restart your computer and check
3. Disable Updates Using Group Policy Editor
Disable Automatic Updates Using Group Policy Editor Windows 10 also offers a way to stop automatic updates using the Group Policy Editor. To do this, follow these steps:
- Press the Windows + R Type gpedit.msc into the box and press Enter to open the Local Group Policy Editor
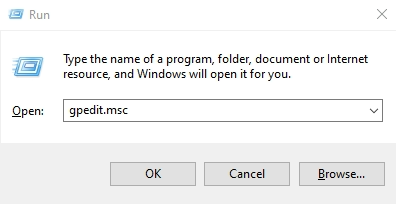
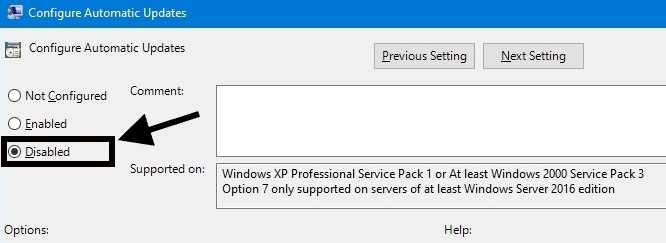
- Navigate to Computer Configuration > Administrative Templates > Double Click on Windows Components > Double Click on Windows Update > Double Click on Configure Automatic Updates
- From the options choose Disable and Click on OK to save Changes
- Restart your computer and check
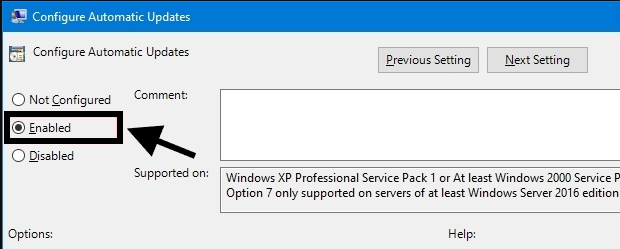
- and in the future, if you want to enable windows updates do the same steps
- Change option to Enabled
Conclusion
With this tutorial, we’ve shown you how to turn off Windows Update in Windows 10 or 11. If you have any questions or comments, please feel free to leave them below. If you found this guide helpful, please share it with your friends. You can also read our other tutorials on How to Change the Boot Drive for Windows 10/11, How to Fix Windows 10 Not booting Up, as well as How to Boot Windows 10 From USB Drive.

Leave a Reply