Facing the blue screen of death while working is one of the worst errors. It makes it hard to operate the system and can sometimes make your files go corrupt, which can be daunting. The Blue Screen of Death displays a Windows error code called Kernel Data Inpage Error (BSOD).
A major software or hardware malfunction causes the Kernel Data Inpage Error, often known as ‘Stop Code.’ As a precaution, the system will ‘force halt’ the OS. You’ll get a Blue Screen of Death as a result. So, now the question arises here: how to fix a kernel data inpage error?
What is Kernel Data Inpage Error?
The kernel data inpage error is a stop code that appears after the blue screen crashes and is caused by an issue with the random access memory (RAM) or the hard drive.
Here are some more error codes and the issues they allude to:
- 0x0000007A: It is a file access problem
- 0xC000009C: There are bad sectors on your hard disc
- 0xC000009D: Faulty hard disc or loose wires
- 0xC000016A: There are bad sectors on your hard disc
- 0xC0000185: It is caused by unseated or broken cables
Causes Of Kernel Data Inpage Error
The main reasons why a user might be facing this issue include:
- Problem with Your Hardware (RAM or Hard Drive)
- The Loose or faulty Wires
- Invalid BIOS Settings
- Damaged Chipset Drivers
- Virus or Malware
- Corrupted Windows Files
- Device Driver Issues
11 Ways To Fix A ‘Kernel Data Inpage Error’ on Windows 10/11
The potential solutions to fix Kernel Data Inpage Error are as follows:
1. Check The Wires and Hardware Connectivity
As one of the most common causes of the issue is the hardware problem, it is wise to start the inspection by checking the wired connectivity and hardware issues.

Start with checking if all the wires are in place and there is no breakage. Then, check if all the hardware is working in the right manner. In case of any kind of disconnect, first, mend it and then try using the same again.
2. Inspect The Hard Drive (HDD)
The CHKDSK can easily correct various problems with hard drives, including minor file system defects, erroneous sector reallocation, and corruption. First, open the elevated command prompt window and type the command as shown below to start the CHKDSK scan.
- Press Windows + R and Type CMD
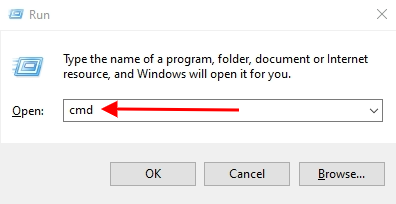
- Then Press Ctrl+Shift+Enter to Launch the Command Prompt window as an administrator
- Now Type CHKDSK Command: chkdsk E: /f /r /x
- Replace ‘X’ with the letter of your disc volume or partition and hit Enter
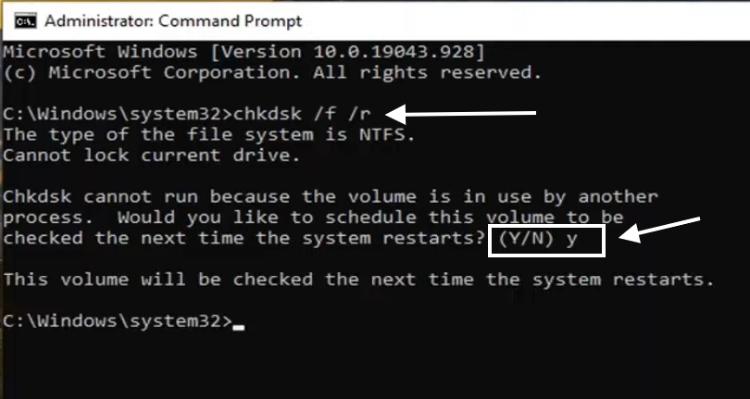
- A command will appear > To start the scan, Press ‘Y’
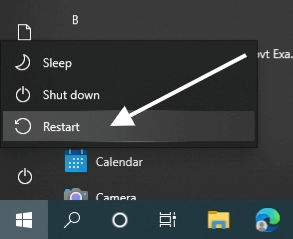
- Reboot system now
- Now use the system without any issue
3. Restore BIOS
Incorrect BIOS settings can also cause KERNEL DATA IN PAGE ERROR. So, if you want to be sure that the BIOS settings are causing the issue, reset the BIOS settings to default by following the instructions below:
- Turn off your PC or Laptop completely
- Press Again Power Key to turn it on then press the F2 key repeatedly when the system boots up
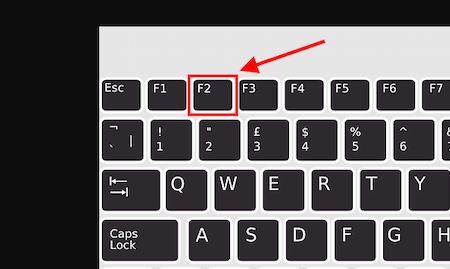
- Enter the BIOS Settings now
- Now here press the F9 or F5 key to ‘Reset to Default’ or ‘Setup Defaults’
- Restart the computer
- Check to see if the Kernel Data Inpage Error has been resolved
4. Start Scan with Antivirus
In rare instances, a virus can damage crucial files and trigger a kernel data inpage error. It’s less likely than the other options, but it’s still worth checking.

If nothing else seems to be working, do a virus scan. Allow any of these applications to identify and remove viruses, then check whether you’re still getting kernel data inpage problems.
5. Run SFC Scan
To fix corrupt, damaged, or missing files, run SFC, commonly known as System File Checker. You’ll need to take the following steps to do this:
- Press Windows + R and Type CMD Then Press Ctrl+Shift+Enter to Run CMD as an administrator

- Accept the User Account Control (UAC) prompt (YES)
- In the command prompt window, type SFC /scannow and hit Enter

- Now it’ll check itself Windows system files and repairs them if required
- Reboot your computer when the SFC scan is complete.
6. Clean Boot The System
To do a clean boot, follow the procedures below:
- Turn off your PC or laptop
- Turn it on Keep and press the F8 key until the Windows logo appears
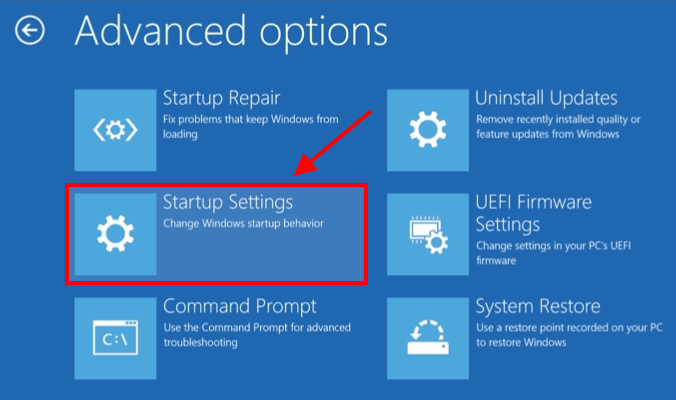
- Under Choose an option Choose Troubleshoot > Advanced Options > Startup Settings
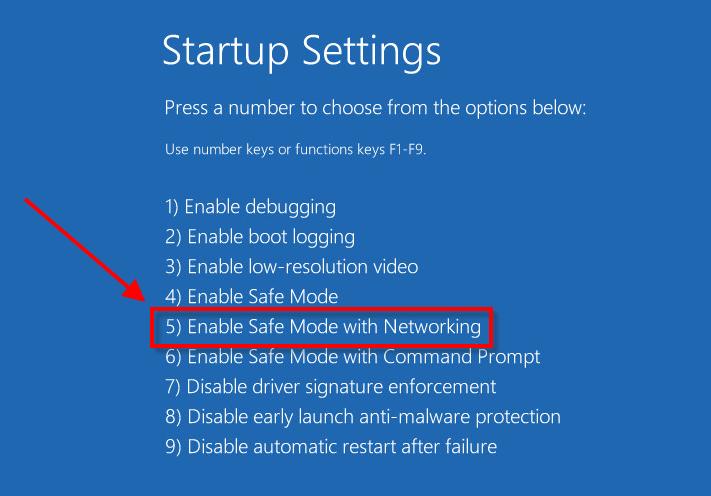
- Use the Number or function key to select ‘Enable safe mode with Networking’
- Log in to your computer
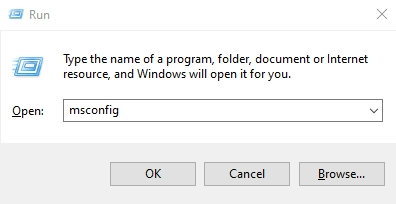
- Press Windows + R and type MSConfig Click OK
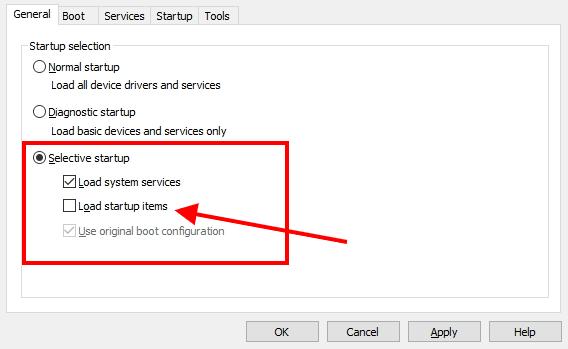
- Under the ‘General’ tab > ‘Load Startup Items’ must be unchecked
- Click on the ‘Services’ tab and Check ‘Hide all Microsoft Services’ Then Click on Disable all
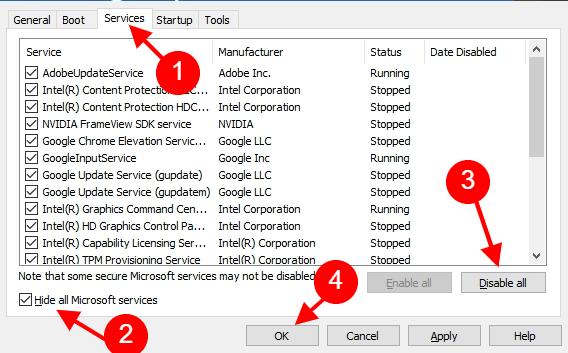
- Then Restart your PC
7. Update Device Drivers
Having an out-of-date device driver incompatible with the system will almost always result in BSOD problems. The following are the steps to updating the device drivers:
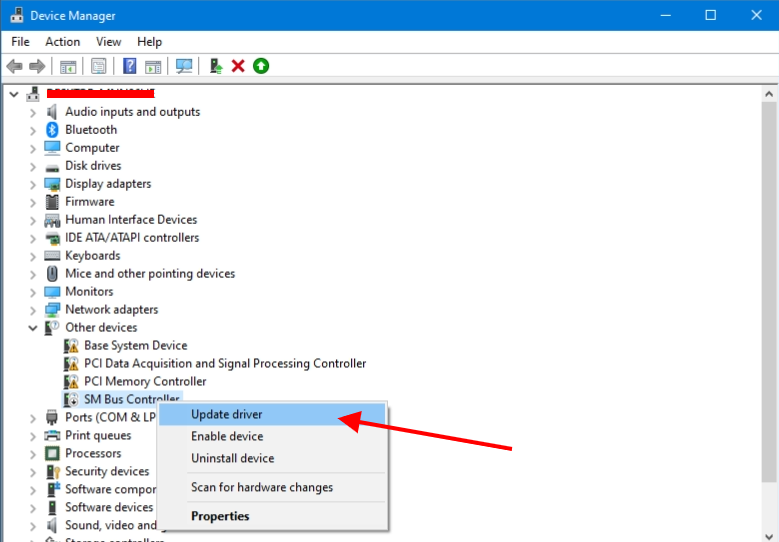
- Press Windows + X Select the Device manager option

- Look for drivers with yellow caution
- Right-click on them > Select Update drivers from the drop-down menu
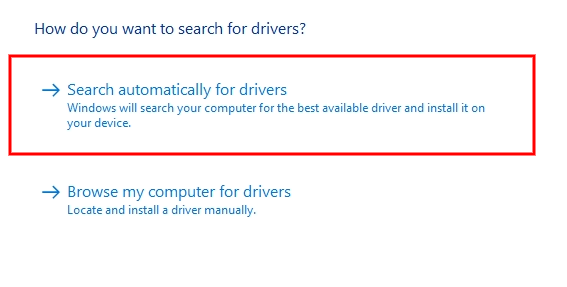
- Select Automatically search for drivers from the drop-down menu
- Restart the computer after you’re finished
8. Automate Paging File Size Management
Follow these methods to automate paging file size management:
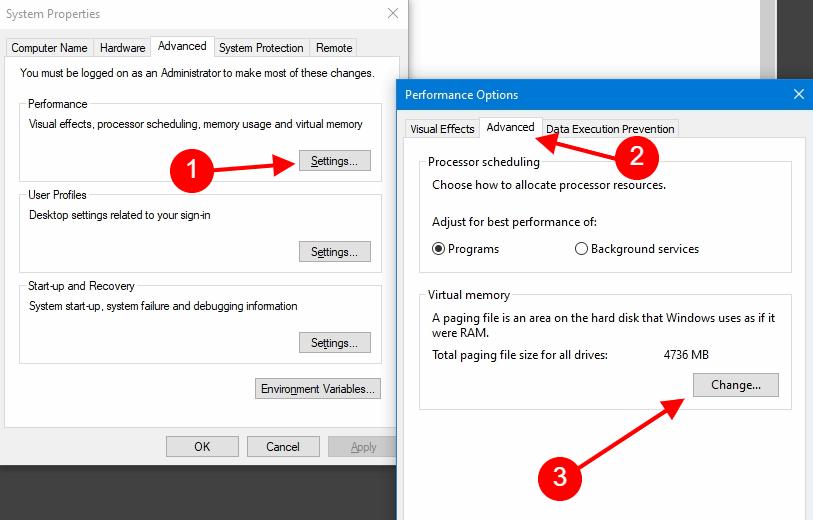
- Press Windows + R and type SystemPropertiesAdvanced Click OK to open Advanced system settings
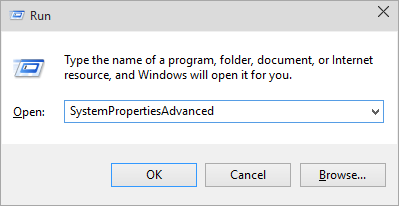
- Under the Performance, Click the Settings button
- Under Performance Options Select the Advanced tab
- Under Virtual Memory, click the Change button
- Check the option, “Automatically manage paging file size for all drives”
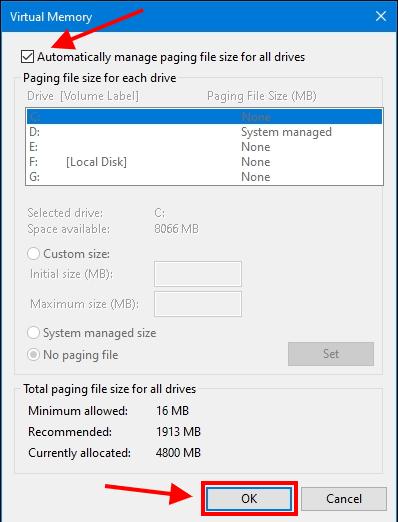
- To save your settings/changes, click the OK button
- Restart your PC or laptop
9. Uninstall Third-Party Incompatible Software
If the software isn’t from a reputable source, it may cause compatibility problems and BSOD errors. As a result, you’ll need to remove any program causing the Kernel Data Inpage Error.
- Press Windows + R type appwiz.cpl Click OK to Open Programs and Features

- Remove any applications you might have recently installed
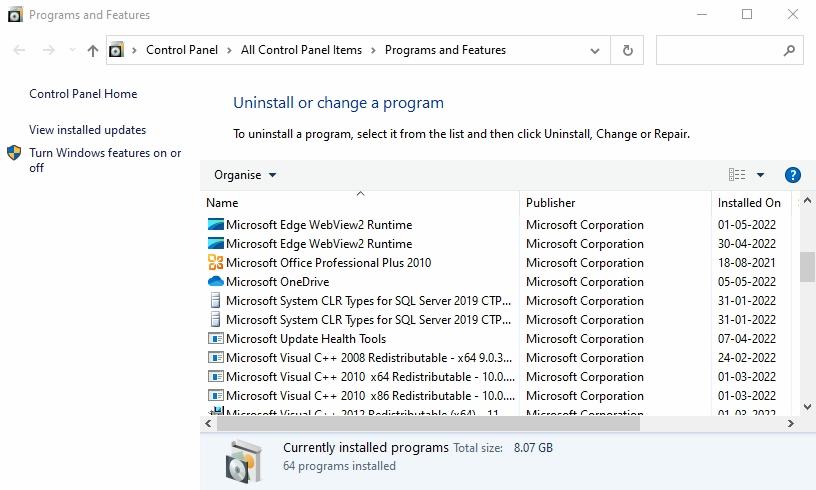
- Check the software’s ‘Installed On’ date before removing it
Or use a third-party uninstaller to uninstall applications from your PC Yes it’s free
 | |
 |
10. Use the Windows Memory Diagnostic Tool
You can utilize the RAM troubleshooting tool offered by Windows, known as Windows Memory Diagnostic. Take the following steps:
- Open Windows memory diagnostic
- Press Windows + R and type mdsched.exe Click OK

- Then Select Restart now and check for problems (recommended)

- After that, choose Restart now and run a troubleshooting check
11. Unplug Unnecessary Devices
This issue on your computer might be caused by unneeded accessories installed on your PC.
- Remove unwanted USB gadgets, external HDDs, and wireless/ Bluetooth adapters from the system
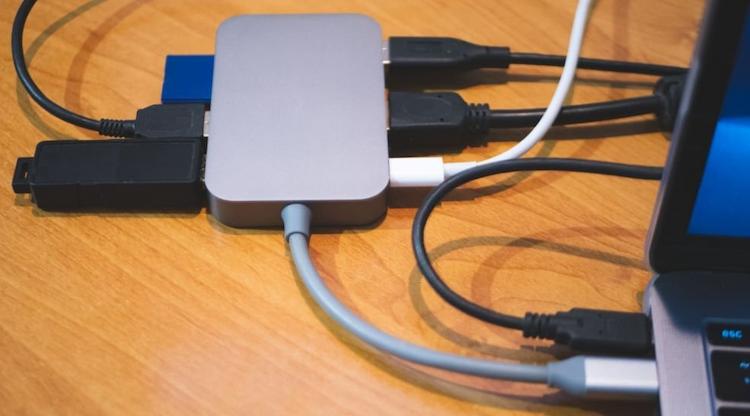
- Check whether this works by rebooting your computer
Conclusion
When Windows fails, and the notorious blue screen of death appears, the kernel data inpage error is only one of the numerous faults. Follow the steps outlined above if you’re having problems with blue screens. You may check the integrity of all your files and folders after the problem has been repaired. Then, try the solutions to how to fix a kernel data inpage error and get your system back to work with ease.
See Also:
if Blikee.com articles are helpful for you then please support us to share our posts on social media Thanks!


Leave a Reply